Friday, 30 December 2022

One Sheet Wonder

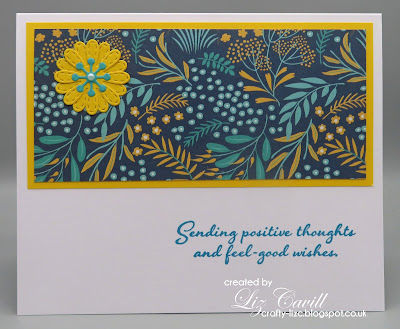
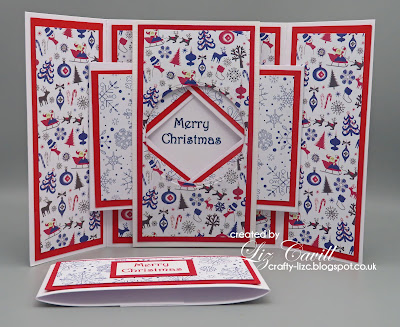
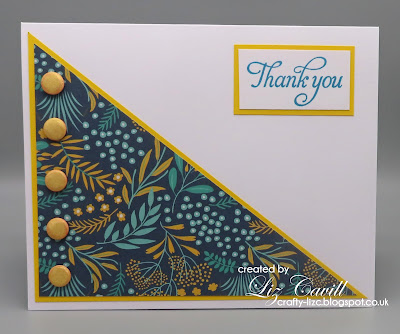
It’s been so wet and windy this week, too wet to spend much time outdoors, so I thought I’d join in with a One Sheet Wonder challenge on the Creative Minds - Kind Hearts Facebook page.  The challenge was to follow a template for cutting up a 12 x 12 sheet of patterned papers and use them all to design a collection of cards. Following the template, I had fifteen triangles and rectangles to work with and this is what I came up with.  The patterned paper is from a 12 x 12 paper pad from The Range.  Although it’s double sided, I challenged myself to use just one side.

To finish my cards I used plain card, die cuts, sentiment stamps, pearls, Card Candi and a piece of ribbon.


I used one full sheet of yellow card, but the navy, white, jade and the rest of the yellow card was from my snippets drawer, so I’ll be joining in the Snippets challenge over in The Playground with my last card.

I am joining in the following challenges with this card:


Sunday, 25 December 2022

From Our Gnome to Yours

MERRY CHRISTMAS 
TO ALL VISITORS TO MY BLOG

I hope you are enjoying the festive season. Thinking of those who find Christmas a difficult time of the year. 

 I used a stamp from the Chocolate Baroque ‘A Tomte Christmas’ and coloured it with Promarkers.  The sentiment was from the same stamp set and I die cut the image with a Memory Box ‘Stitched Rectangle Layers’ die.  The card shape was made with a Presscut ‘Step Card’ die. I embellished my card with grey Card Candi and punched yellow stars to pick out the colours in the image. 

I am joining in the following challenges:


Thursday, 22 December 2022

Pillow Boxes, Crackers and Tags

My laptop crashed this week, so I’m attempting to edit my blog on my iPad. Looks like it’s going to be an expensive job and it won’t be fixed until the New Year. 😞

A few last minute Christmas things made this week.

Chocolate filled pillow boxes for place names for a meal out with friends.....

Chocolate filled mini crackers for place names for Christmas Day......

..... and a few of the pile of tags I made today.  The trees are stamped with a SU stamp using Versafine Clair 'Green Oasis' with a punched gold star on the top. The tags ARE all the same shape and size - who said the camera never lies! 😉

I am joining in the following challenges:


Monday, 19 December 2022

Granddaughter

Our granddaughter is celebrating her 13th birthday today and this is the card I made for her.

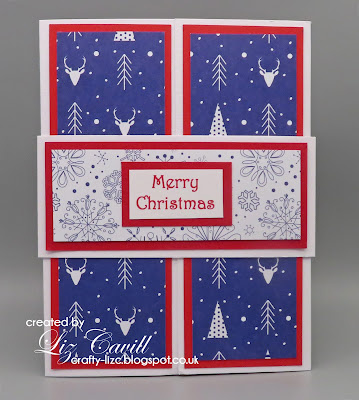
Having recently discovered how to make shutter cards, I’ve made several over the last few weeks.  The papers are from a paper pad from The Works and the belly band keeps the card closed. 

This is the inside of the card. I made two flowers with dies to add to the inside panels. 

Here is a little video to show how the card opens.


Shutter cards are so much easier to make than they look.   I made a short video HERE which shows how I make mine.

I am joining in the following challenges:


Saturday, 17 December 2022

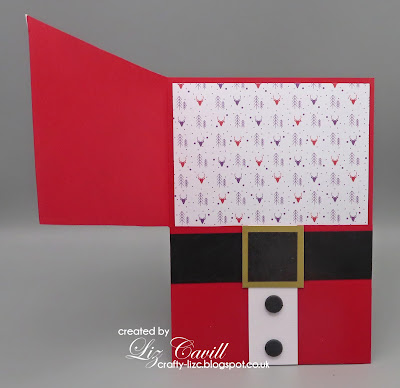
Santa Gift Card/Money Holder

With my Christmas cards finished, it was time to make four Gift Card/Money Holders this weekend.

I was inspired by a design HERE on Di’s blog.  I put my own twist on it and used an idea HERE, where the front is split in two, with just the top section opening.  The collar was made with two circle punches and the buttons are black Card Candi. 

The inside is decorated with patterned paper from The Works. 

I did try to take a photo with a bank note inside, but my computer somehow picked up that a part of a banknote was showing, threw up an error massage, and wouldn’t open the photo using my editing software. I guess I won’t be able to print my own banknotes. 🤣

I am joining in the following challenges:


Wednesday, 14 December 2022

Crochet

A friend of mine makes beautiful crocheted things, so I made her a CAS card with this theme for her birthday.

I bought a bundle of dies in a sale recently and this Crafter's Companion 'Needles and Yarn' set was part of the bundle.  The set also includes knitting needle dies.  I think the ball of wool die is suppose to actually cut out thin strips in the image, but I couldn't get it to cut right through, so I decided to leave it intact with just a pattern showing.  I used a piece of matching crochet cotton and attached it to the die cut crochet hook.  The ball of wool and crochet hook were layered on a white rectangle, die cut with a Sizzix 'Stitched Rectangle'.  Three blue pearls finished off my card. All the card, except for the base card was snippets, so I'll be sharing my card over in the Playground.

I am joining in the following challenges:


Tuesday, 6 December 2022

Hexagonal Cracker Gift Box

I've made all my Christmas cards, so something different today.  I made a Hexagonal Cracker gift box, following a tutorial I watched HERE.

I used a sheet of patterned paper from The Work and the snowflake is a Sizzix 'Flurry #2' die cut. The gift box is 7" long by about 3" wide, so a great size for a small gift.


The ends have a hexagonal piece of card inserted to stop the gift falling out, but can easily be removed to take out the gift.

I am joining in the following challenges:


Saturday, 3 December 2022

Thinking of You

The December Crafty Calendar Challenge begins today with an 'Anything Goes' theme.  Our generous sponsor this month is 'Lawn Fawn'.

My DT card is a CAS this month.
 
I used a Quickutz embossing folder which I've had for years.  It was pre-loved when I bought it, so was probably discontinued a long time ago.  After embossing the white card, I used my stamp platform to stamp the sentiment so it was in the correct place.  The pink flower centres were die cuts and I added a white pearl in the centre of each flower.  I layered the embossed card on a pink mat and added three pink pearls.

The Crafty Calendar Challenge ends on 28th December.  Please pop over the blog to see all the fabulous creations the DT have made. 


Wednesday, 30 November 2022

Star Easel Card + Snowman Tag

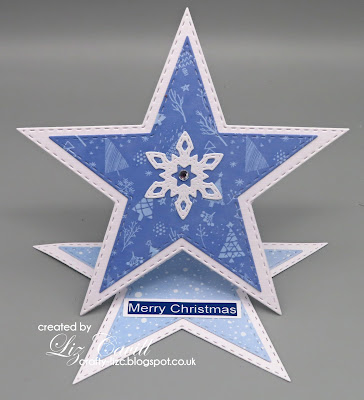
A Star Easel Christmas card today, which I saw demonstrated on Elisabeth Hogarth Design YouTube channel HERE.

I used Lisa Horton's 'Layered Stars' dies and a die from the Memory Box 'Twilight Snowflakes' set. I added a clear gem in the middle of the snowflake.  The patterned paper is from a paper pad from The Works. The original design had the points of the folded star at the back showing, but I decided to chop them off.

Here is a side view of the card.
 
I am joining in the following challenges:


I finished off this tag today.
 
I used an MFT 'Cross-Stitch Tag' die and using crochet cotton for the design.  

I am joining in with the following challenges:


Tuesday, 29 November 2022

Aussie Christmas

Friends of ours have just flown off to Australia to spend Christmas with their daughter and her family.  This image was just perfect for their Christmas card, which they will open when they arrive.

The image is a pre-coloured digi stamp from Beccy's Place 'Aussie Christmas' set.  The sentiment is also from the same set.  I used a Sizzix 'Stitched Rectangles' die to die cut the image and layered it on a red mat.  The patterned paper was from my snippets drawer and the design and colours were perfect to match the candy canes. I finished off my card with three silver and green stripy sequins to add a little sparkle.

The As You Like It Challenge asks for your favourite non-traditional Christmas Animal (and why).  This year mine is a kangaroo, because it is perfect for friends spending Christmas in Australia.

I am joining in the following challenges:


Monday, 28 November 2022

Christmas Goose

A fun Christmas card today.  I'm catching up with some of the letters I missed in Beccy's Month of Holiday Cards Challenge, so for this card I've chosen G for Goose.

The image is a pre-coloured digi stamp from Beccy's Place called 'Grumpy Goose'.   The sentiment is a from the same set.  I die cut the image using a Creative Dies 'Wonky Stitches' rectangular die and layered on a navy blue mat.  The patterned paper is from a paper pad from The Works.  Three tiny yellow pearls finished off my card.

I am joining in the following challenges:


Sunday, 27 November 2022

Christmas Shutter Card

I made my first Shutter Card last month, you can see it HERE.  It includes a little video clip of how it opens.

For this shutter card I used Christmas papers from The Works.  They were all snippets from the 12 x 12 paper pad, so I'll be sharing my card over in The Playground.

This is the inside of the card.

As part of the 'Creative Minds ii Kind Kinds' Facebook group I was asked to make a video for our 5th Anniversary celebration event yesterday.   Now, I've never made a video before and it was totally out of my comfort zone, but I thought I'd give it a go and demonstrate how to make this card.  It was strange sat in my dining room on my own, talking to myself!  I recorded it in several short clips and a friend 'stitched' them all together.  You can see my finished video by clicking on the link below.


I am joining in the following challenges:


Saturday, 26 November 2022

Joy Fold Card Tutorial

The first fancy fold card I made many years ago, when I'd only ever made single fold cards, was a Joy Fold card.  I've made many cards using this fold over the years for all different sorts of occasions and it's a really easy card to make.  I've made a tutorial for the 'Creative Minds ii Kind Hearts' Facebook group which goes live today, so I thought I'd share my tutorial here on my blog too. (If you're on Facebook, it would be lovely to see you in the group where there is lots of inspiration for cardmaking and papercrafts.  Don't forget to answer the joining questions.)

 Here are the instructions for how I make my Joy Fold card.  My finished card measures 7" x 5" when folded.

1. Start with an A4 sheet of card.  Cut at 5" down the length of the card.  The largest piece will be your base card.  Score this piece at 7" and fold along the scoreline.  Save the narrower piece for later.

2. Cut one mat 1/4" smaller than the front panel and one mat 1/4" smaller than the inside back panel. Cut two contrasting pieces of patterned paper 1/4" smaller than the mats.

3. Attach the layered patterned paper to the card as shown in the photo.

4. Make the topper for the front of your card.  I've used a die cut and gems for mine and measures 3" x 3", but you could use a ready made topper or a stamped image or sentiment.  

5. Trim the width of the long strip of card to 1/4" wider than the height of the topper.  If the long strip of card is not wide enough, you will need to cut a new strip from a second piece of A4 card.  The scoring of the strip of card depends on how wide your topper is.  As my layered topper was 3" wide, I scored at 3 1/4".  Attach the topper to the strip ensuring that the fold is on the right hand side.

6. Keep this card folded and cut off the end so that when folded it measures 5" long.

7. Add a layered piece of white card as shown, this will be where the message will be written. I've attached a punched Christmas tree for added interest. 

8. Attach the smaller card inside the larger one.  I've put mine right in the middle, but move it left or right to see which position looks best when the card is closed.

9. Add a sentiment.  I like to be able to keep my card closed, so I use a brad to do this.  Put a pencil mark on the card front, just to left of bottom left-hand corner of the topper.  Make a small hole just through the card front, through the pencil mark.  This can be done with a paper piercer, but I find it easier to use a punch which makes a very small hole.  Push the brad through the card front and secure.  (Depending on the thickness of the brad, the card may need a large letter stamp if posted.)

10. The bottom corner of the topper should just slip in behind the brad.
 
The card can easily be opened to be displayed.

If you haven't tried this fold before, I hope you give it a go.

I am joining in the following challenges: